

Arc Studio CLI: Build Onchain from Your Coding Agent

Summary
Whether you build with Claude Code, Codex or Cursor, your coding agent is already working with your application's code, interfaces and requirements. Adding an onchain feature should not mean leaving that context behind or moving the whole project into another tool.
But onchain work involves more than generating a contract. You need to test behavior, work with deployed contracts and understand what happened when a transaction ran. Setting up that tooling takes attention away from building the application.
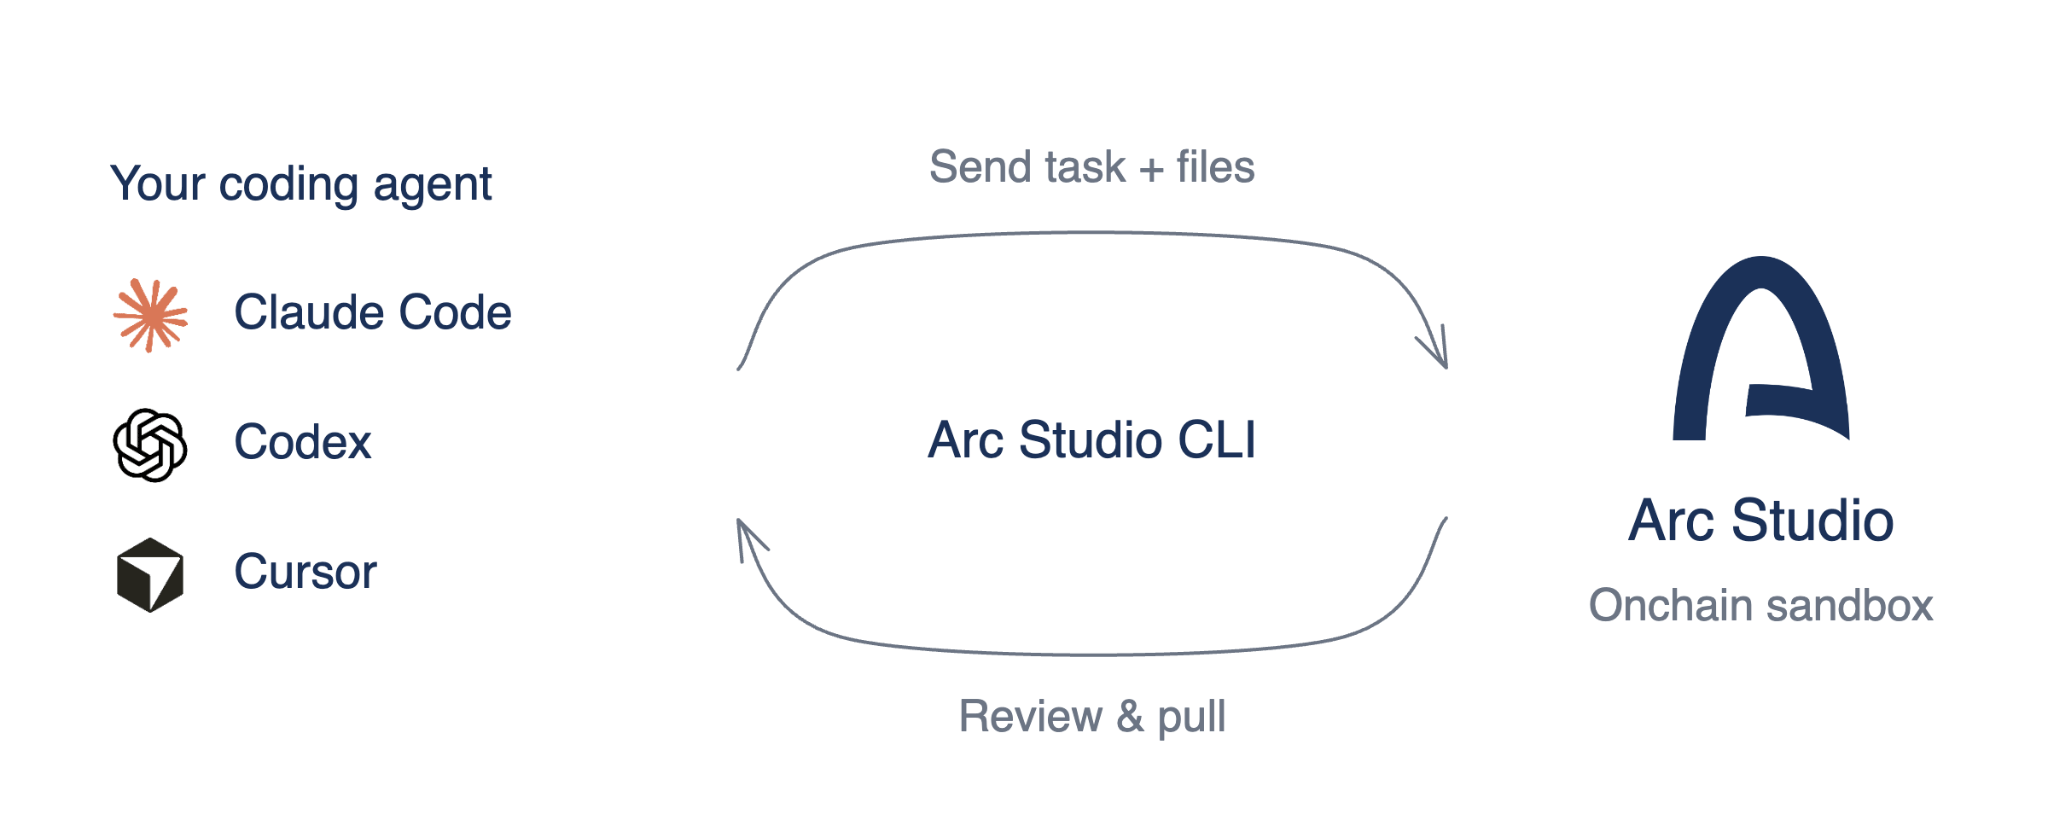
Arc Studio provides a specialist environment for that work, with contract tooling, testing, deployment and onchain visibility in its sandbox. The Arc Studio CLI connects it to your coding agent or terminal. Send a focused task and relevant files, inspect the work in Studio, then review and pull the results back into your project. Your coding agent keeps the wider application context, and Studio handles the onchain task. The example in this guide adds a USDC checkout that holds each payment until the customer’s order arrives.
What you'll learn
- How Studio complements your coding agent as an onchain specialist.
- How to decide which rules belong onchain, using a checkout that holds payments until delivery as the example.
- How to use the CLI to send tasks and relevant project files, then inspect the work in Studio's sandbox.
- How to review and pull results back into your application, then iterate without leaving your existing workflow.
What Arc Studio CLI brings into your workflow
Studio is designed around Arc and Circle's developer stack. It can inspect deployed contracts and read their current state, so you can start with a contract your application already uses.
For a checkout, that could mean building against an existing payment contract, testing additional payment rules or investigating a failed transaction. Studio's trace panel helps connect what the sandbox app requested with what happened onchain.
What onchain features can you add to your application?
Choose an onchain task to send through the CLI, whether it is a feature in an existing product or an idea you are exploring:
- Payments and checkout: accept USDC and hold each payment until the customer confirms the order arrived, then release it to the store, or refund the customer if the order doesn’t ship. Match each payment to an order, show its status in your application, and handle expired requests and repeat payment attempts as part of the checkout flow.
- Treasury operations: define who can move funds, which recipients are allowed and when approval is required. Bring those controls into the dashboard your team already uses.
- Revenue sharing and payouts: split incoming USDC between recipients according to defined shares. Consider an existing protocol such as Splits, or explore a custom implementation in Studio with the Revenue Router tutorial.
A basic payment may use existing USDC contracts. Custom contracts become useful when the application needs additional rules, such as allocation, authorization or conditional release. Holding a customer’s payment until their order arrives is one example: neither the store nor the customer can take the funds for themselves, and the contract decides when they are released or refunded.
Connect the CLI to your coding agent: Claude, Codex, Cursor, etc.
The CLI setup guidance covers installing the CLI and signing in. Studio also provides a setup prompt under Use with your agent on its homepage that you can give to your coding agent.
Claude Code, Codex and Cursor use the same CLI underneath. The setup prompt includes an additional skill and subagent registration step for Claude Code. Follow the guidance for your tool, then return to the project you are building.
After setup, an example request to your coding agent could be:
Add a USDC checkout to this application that holds each payment until the customer confirms they received the order, and refunds the customer if the order doesn't ship. Keep the existing frontend and backend. Work out which payment rules belong onchain, then use Arc Studio for that work on Arc. Send the relevant requirements and interfaces, and show me the Arc Studio workspace link. Before downloading files, show me the proposed contract and test changes. Once I have reviewed them, pull the files into this repository and update the checkout so it shows each order's payment status only after verifying it onchain, and every onchain action shows its transaction hash with a link to the explorer.
This is an illustrative request you can adapt to your application. It describes what the agent should accomplish and which decisions need your review. Add the details only you can decide, such as the wallet that receives payments and how long a customer has to confirm delivery before the payment is released. The agent can translate that request into the CLI operations.
Send the task and relevant files
Your coding agent can inspect the application and prepare the requirements for the onchain work. For a checkout that holds payments, useful details include the accepted token, intended recipient, payment amount, order reference and expiry rules, plus who can release or refund a held payment and when. For example, the store is paid when the customer confirms delivery or a set number of days after shipping, and the customer can reclaim the payment if the order hasn’t shipped by an agreed date.
Ask it to identify the cases the implementation must handle: a rejected wallet request, a failed transaction, an expired checkout, a repeated payment attempt, an order that never ships and a customer who never confirms delivery. Those cases affect both the contract rules and the application’s response.
A short specification file can help keep these decisions with the project, but a particular filename or folder structure is not required. Relevant interfaces, an existing contract or a focused set of source files can also provide the context.
The CLI's file handoff makes that boundary explicit. Send files as read-only references, or as files Studio can edit in its sandbox. Studio does not automatically read or update your local repository.
Open the sandbox while the work runs
A CLI request and the browser workspace are two ways to access the same Studio app. The CLI returns a link to the Studio workspace. Ask your coding agent to show you that link.
Open that link to inspect the files, terminal, preview and contract workbench. You can follow what Studio is doing while keeping the application open in your usual editor. The browser gives you a view into the specialist's work without requiring you to move the rest of the project there.
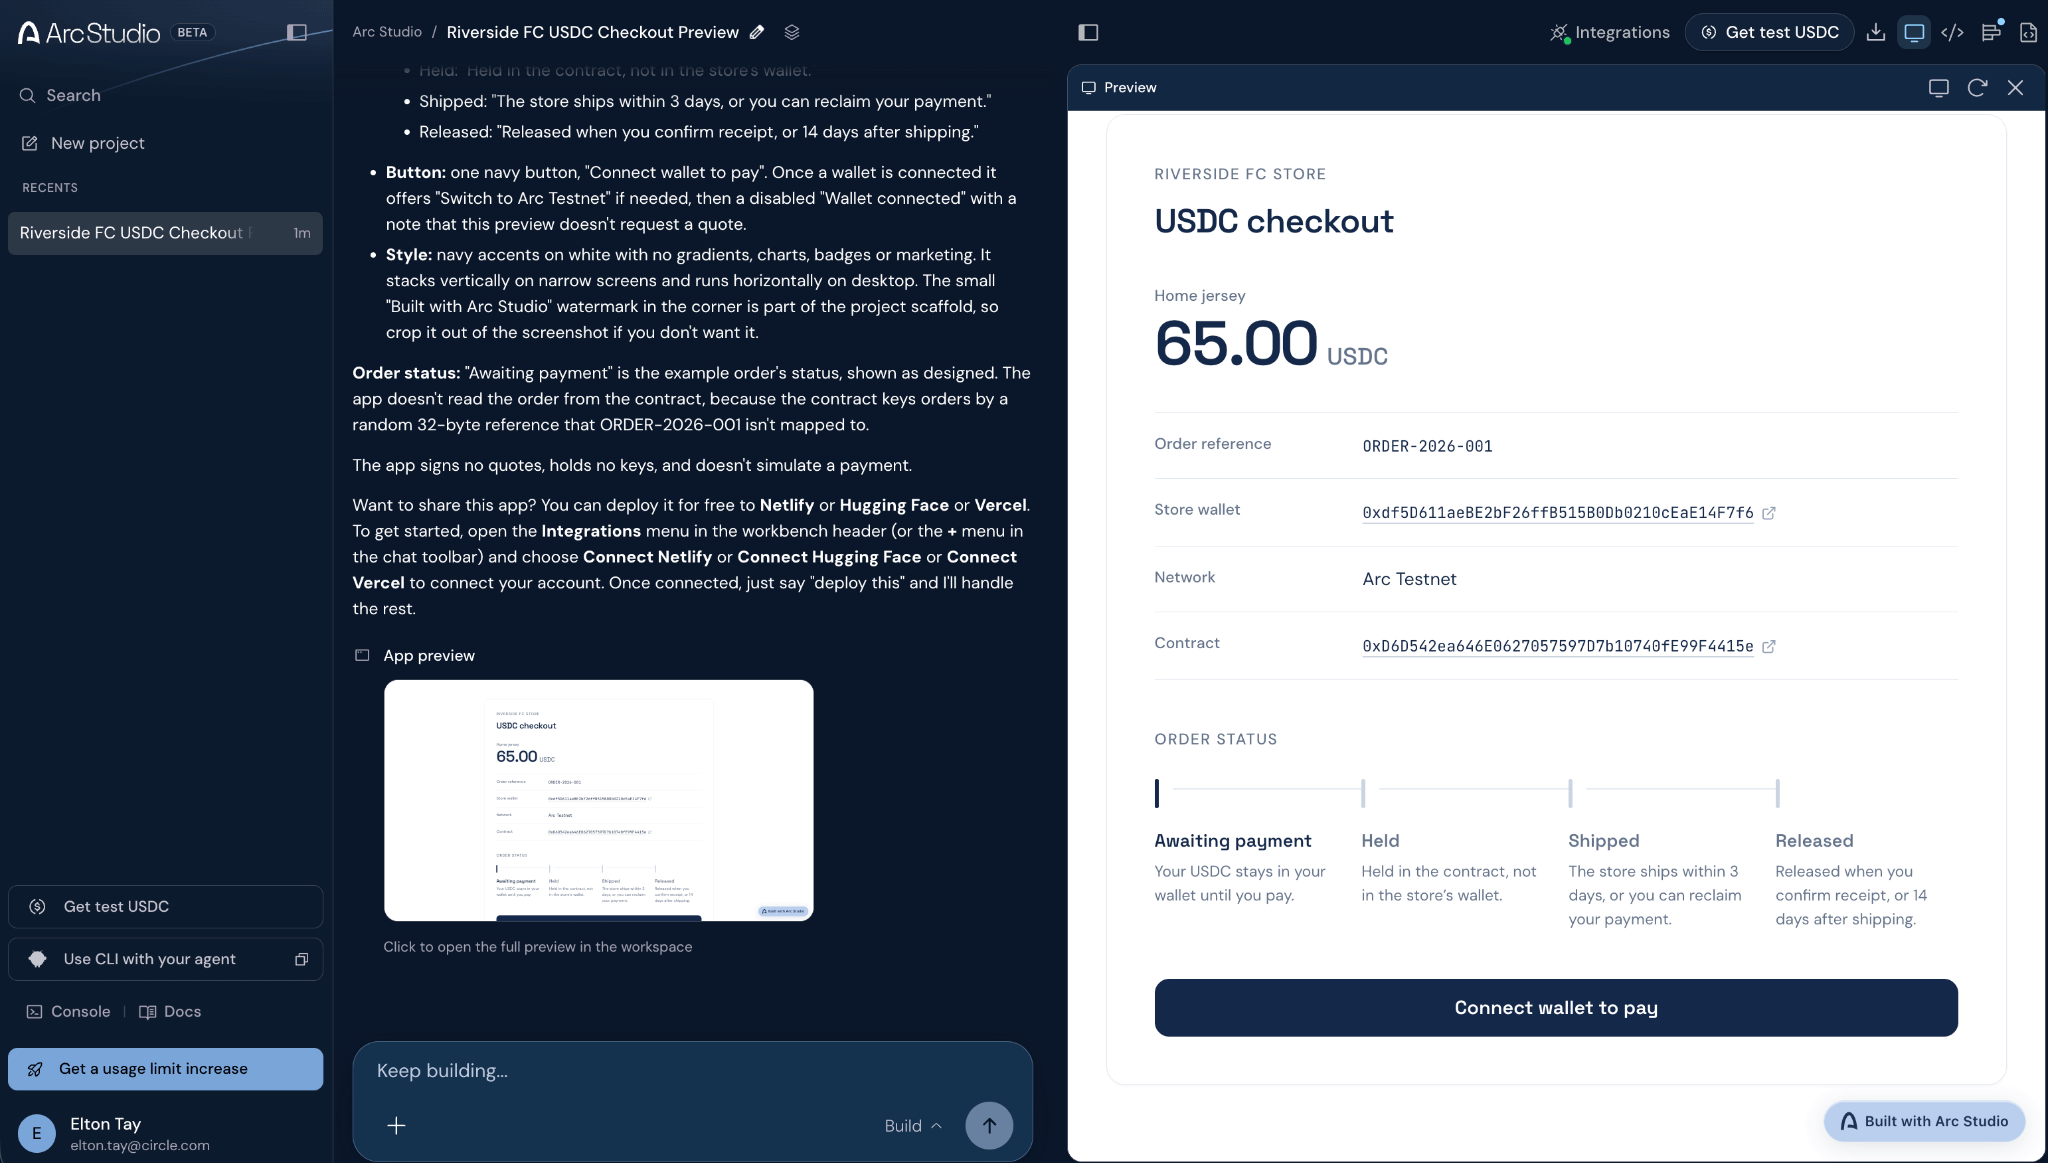
Use Studio's trace panel to follow the sandbox app's RPC calls, transactions and decoded events alongside its offchain requests. This helps you investigate how an application request reached the chain, rather than debugging only from the generated source. Use the returned deployment details to confirm the network and inspect the contract in the Arc explorer.
Pull the result back and connect the application
You can inspect the workspace before downloading anything. When you are ready, ask your coding agent to preview the proposed pull with a diff, then download the selected contract files and tests into the project.
The CLI supports a dry run for that preview. It also tracks downloaded files and skips locally edited files by default on later pulls. The code transfer reference explains how to select files and handle changes.
Once the files are in your repository, your coding agent can connect the checkout button to the contract, show transaction status and check whether the order’s payment is held, released to the store or refunded.
For example, the small interaction below shows the successful path through a USDC checkout, from payment to release:
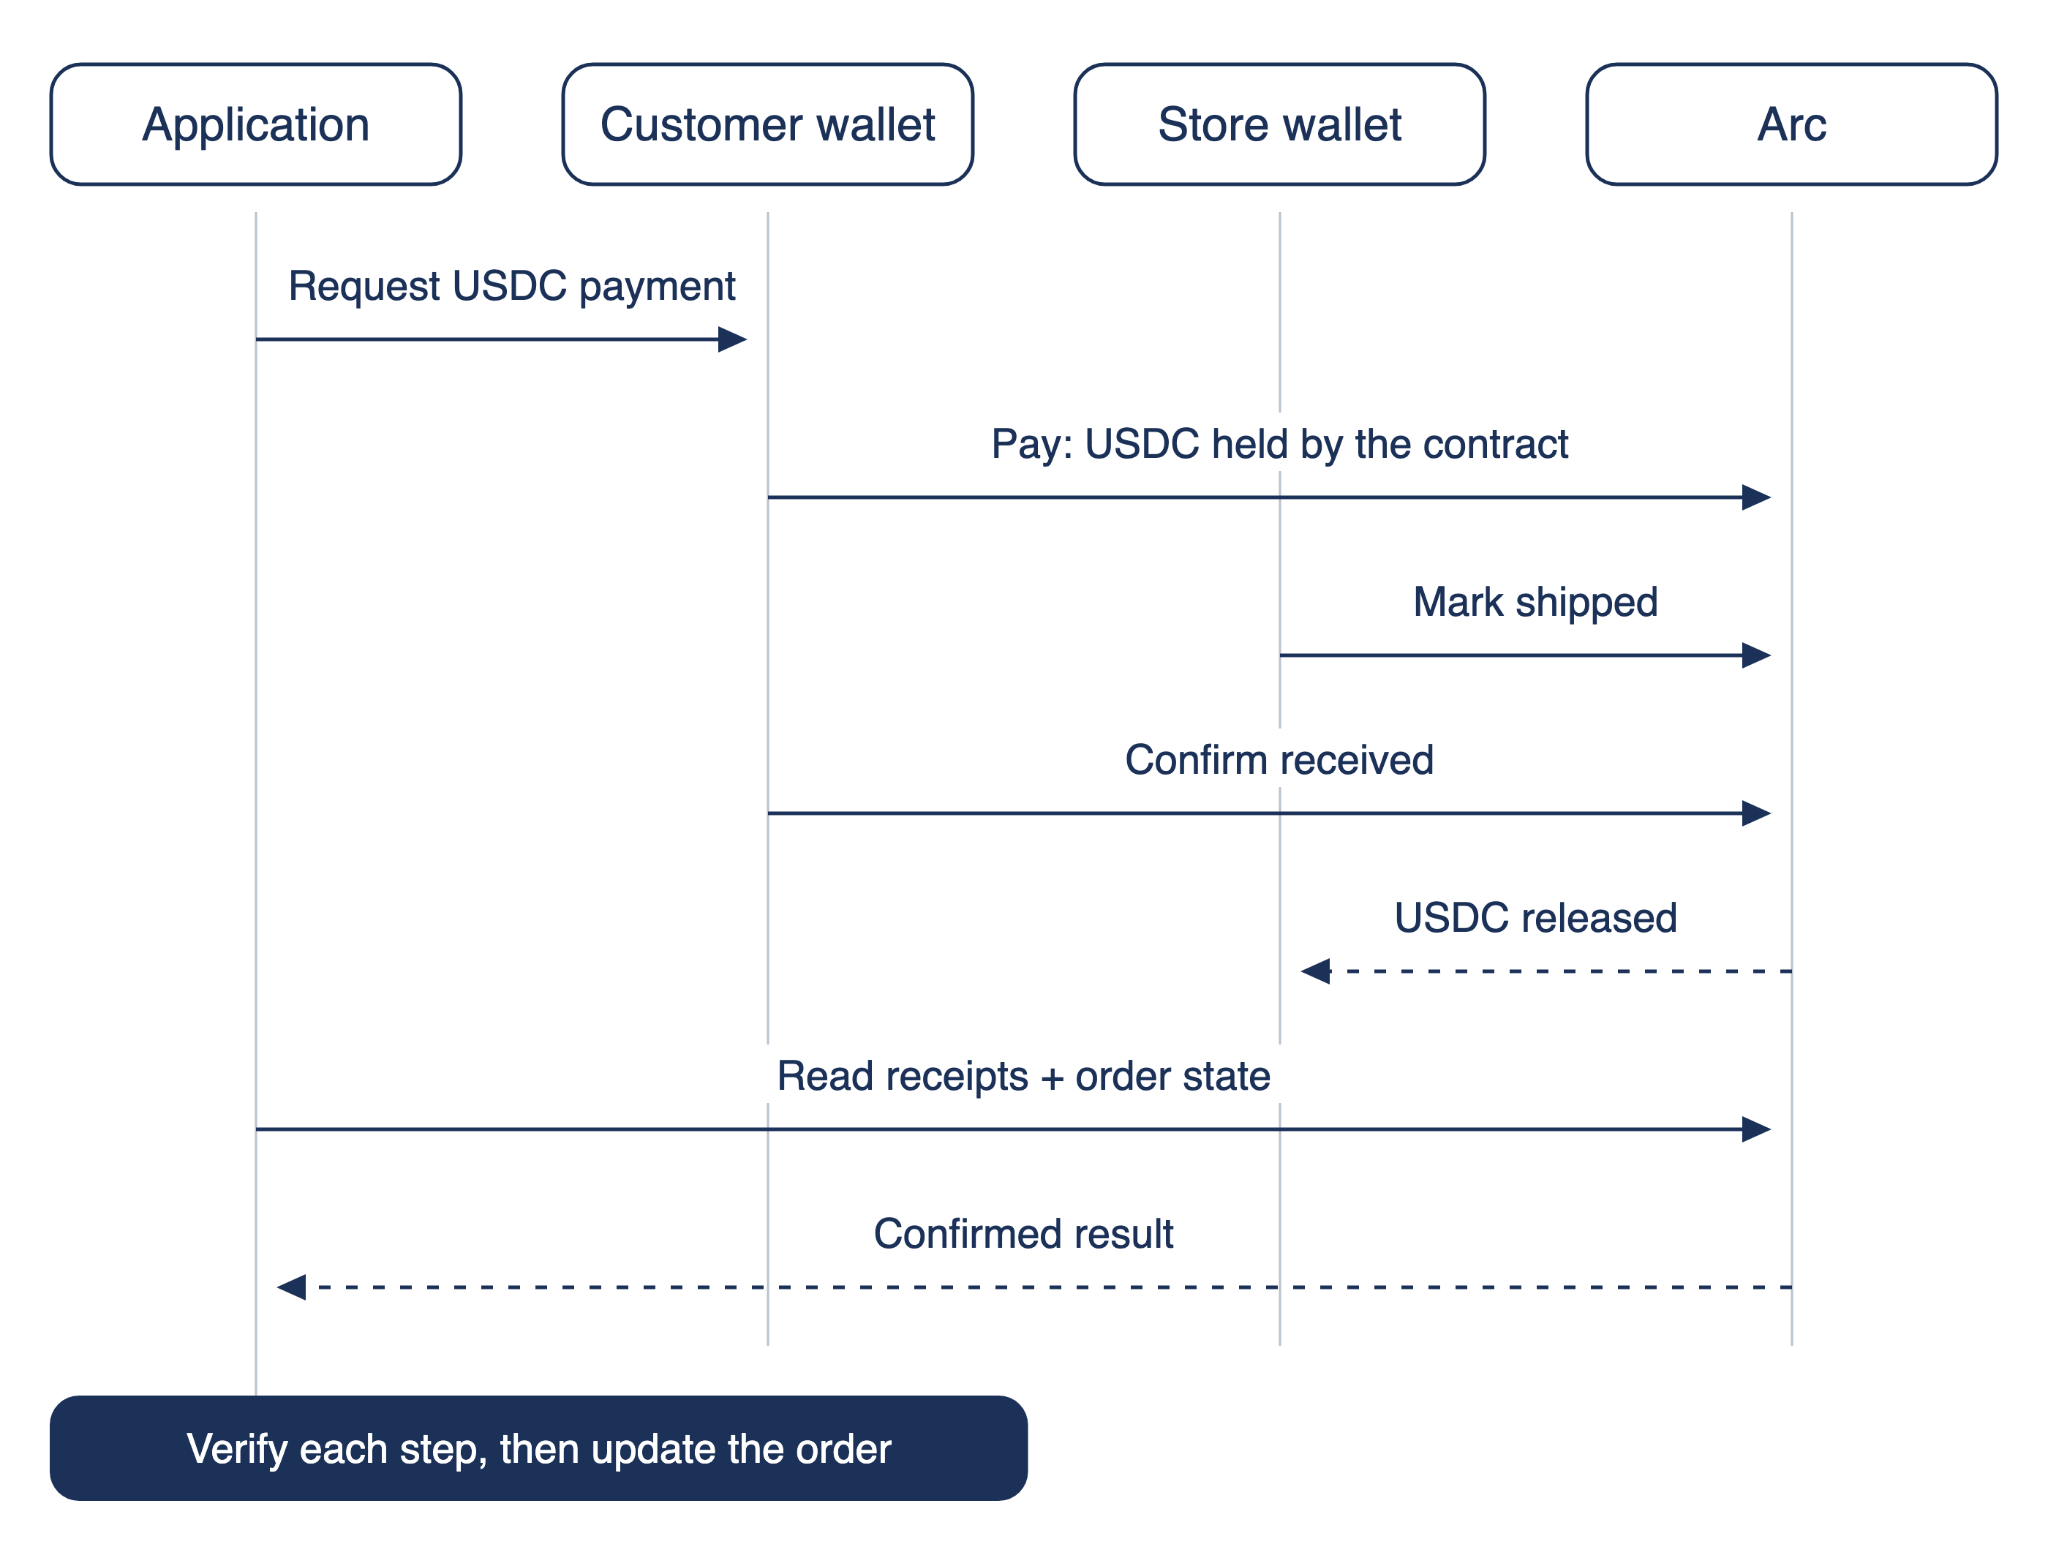
A wallet signature or transaction submission alone should not mark an order paid. The application needs to check the confirmed result against the intended payment, including the amount, the contract holding the funds and the order reference where the design uses one. The same check applies when a payment is released or refunded. If the user rejects the request or the transaction fails, the application should display that outcome and offer the appropriate next action.
Review the generated code and run the tests in your own environment before integrating it. A contract that holds customer funds needs that review most.
Continue from Arc Studio or your coding agent
A later product change can become another request to Studio. For example, a contract can’t see on its own whether a parcel arrived. A store could let its delivery partner, through an oracle that reads the carrier’s tracking data, mark orders shipped and delivered, or add a dispute window with a referee who can release or refund a disputed payment. Send the updated rules and relevant files, inspect the result in the sandbox, then pull the changes back when they are ready to integrate.
You can also use the CLI's interactive terminal session to work with Studio directly, without another coding agent driving the request.
You can also begin in the browser. To continue a browser-built app from your coding agent, the CLI can target that existing app by ID and pull its files. The files stay with the app, but a new CLI conversation does not include the earlier chat history. Restate the requirements and decisions it needs.
That leaves you free to choose where each piece of work happens. Keep developing the application in your current tools, use Studio for the onchain task, and bring the result into the project whenever it is useful.
Install the CLI and try an onchain feature
Install the Arc Studio CLI, connect it to your coding agent and choose one onchain feature your application needs. Ask the agent to use Studio and show you the workspace link and proposed changes before bringing code into your project.
Arc mainnet is an open L1 blockchain launched and offered by Arc Network Services LLC (“Arc LLC”) and operated by a permissioned validator set. Arc testnet is offered by Circle Technology Services, LLC (“CTS”). Arc LLC and CTS are software providers only and do not provide regulated financial or advisory services. Neither the Arc mainnet nor testnet has been reviewed or approved by the New York State Department of Financial Services or any other regulatory authority.
The Arc network is provided “as is” and “as available.” Use of Arc involves inherent risks associated with blockchain technology, including smart contract vulnerabilities, network disruptions, and the absence of recourse for transaction errors or losses. The ability to transact on Arc depends on the ability to obtain and use USDC to pay gas fees. Neither Arc LLC nor any permissioned validator is responsible for the content, accuracy, legality, or functionality of third-party applications, protocols, or services built on or integrated with Arc.
You are solely responsible for any features or services you provide to users, including obtaining any necessary licenses or approvals and otherwise complying with applicable laws. All Arc features may be modified, delayed, or cancelled at any time without notice and, where applicable, at the sole discretion of Arc LLC or CTS. Nothing herein constitutes a commitment, warranty, guarantee, or legal, regulatory, tax, or investment advice.
Transactions on mainnet involve real funds and, once submitted, are irreversible. Arc Studio may generate or edit code or configuration that references mainnet, but Arc Studio does not deploy to, transact on, sign for, fund, or otherwise interact with mainnet on your behalf. Any code used for mainnet must be independently reviewed, tested, validated, deployed, and operated by you outside of Arc Studio. You are solely responsible for any losses, errors, or other consequences resulting from your use of any code, configuration, or output generated or edited through Arc Studio in connection with mainnet. Before proceeding, you should first use testnet, obtain an independent professional audit, and carefully review all wallet addresses, contract addresses, chain settings, permissions, and other configuration details. Only continue to mainnet after you have completed your independent review and have determined that you want to proceed.